Uneven walls can be a challenging obstacle when it comes to drywall installation, but with the right techniques, you can achieve a smooth and professional finish. Whether you’re renovating an old home or tackling a new project, properly addressing wall unevenness is crucial for a flawless result. Uneven surfaces can lead to issues with drywall alignment, tape seams, and overall finish quality. In this blog, we will explore the top 10 drywall installation tips specifically designed to handle uneven walls. By following these expert strategies, you can ensure a seamless application that enhances both the aesthetics and durability of your drywall. Let’s dive into the essential techniques that will make your drywall installation a success.
Drywall Installation Tips for Uneven Walls
1. Assess and Prepare the Wall Surface
Before starting drywall installation, it’s important to assess the extent of the unevenness in your walls. Use a level and a straightedge to check for dips, bumps, and other irregularities. Mark these problem areas so you can address them accordingly. For minor unevenness, you can often use joint compound to even out the surface. Apply a thin layer of compound to the low spots, then sand it smooth once it’s dry. For more significant irregularities, consider using furring strips or shims to bring the wall into alignment. Preparing the wall surface properly is essential to ensure that the drywall adheres well and that you achieve a smooth finish.
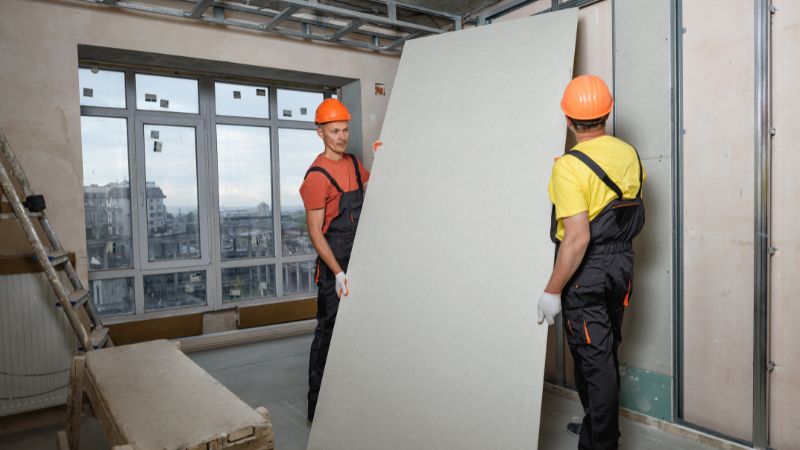
2. Use a Drywall Lift for Better Control
A drywall lift is an invaluable tool for handling drywall installation on uneven walls. This device helps lift and hold the drywall sheets in place, making it easier to align them correctly. When working with uneven surfaces, the lift allows you to make precise adjustments without straining yourself or risking damage to the drywall. It also helps to reduce the likelihood of gaps and misalignment. By using a drywall lift, you can focus on ensuring that each sheet is properly aligned and secured, which is crucial for a smooth finish on uneven walls.
3. Apply a Quality Primer Before Installing Drywall
Applying a high-quality primer to your walls before installing drywall can help address minor imperfections and provide a better surface for adhesion. A primer can help seal the wall surface, reducing the absorption of moisture and preventing issues with drywall installation. It also enhances the bond between the drywall and the wall, ensuring that the drywall adheres properly. When dealing with uneven walls, the primer helps to create a more uniform surface, making it easier to achieve a smooth finish. Be sure to choose a primer that is compatible with your wall surface and drywall.
4. Utilize the Right Drywall Thickness
Selecting the appropriate drywall thickness is crucial when dealing with uneven walls. Thicker drywall, such as 5/8-inch sheets, can help cover up minor imperfections and provide a more solid and durable finish. For walls with more significant unevenness, you may need to use thicker sheets or even double-layer drywall to achieve a level surface. Ensure that the thickness you choose is compatible with your wall framing and meets building code requirements. Properly sized drywall helps to minimize gaps and create a more even surface, which is essential for a professional-looking installation.
5. Install Drywall with Proper Fastening Techniques
When installing drywall on uneven walls, proper fastening techniques are essential to ensure a secure and stable application. Use drywall screws rather than nails to attach the sheets to the wall studs, as screws provide a more reliable hold and reduce the risk of future problems. Space the screws evenly along the edges and in the field of the drywall, following the manufacturer’s recommendations. Ensure that the screws are driven just below the surface of the drywall but do not break the paper. Proper fastening helps to minimize movement and potential gaps, leading to a smoother finish.
Read Also: Top 10 Common Mistakes to Avoid in Drywall Repair
6. Use Drywall Taping and Mudding Techniques
Drywall taping and mudding are critical steps in achieving a seamless finish, especially on uneven walls. Start by applying a layer of joint compound to the seams and corners where the drywall sheets meet. Embed drywall tape into the compound to reinforce the seams and prevent cracks. Apply additional layers of joint compound, feathering the edges to blend them with the surrounding surface. Sand between coats to create a smooth, even finish. For uneven walls, be patient and allow each layer to dry completely before sanding. Proper taping and mudding techniques are essential for hiding imperfections and creating a polished look.
7. Apply Texture for Concealment
Applying texture to your drywall can be an effective way to conceal unevenness and imperfections. There are various texturing techniques, such as knockdown, slap brush, or popcorn, that can help hide surface flaws and add visual interest to your walls. Choose a texture that complements your room’s design and effectively masks any remaining uneven areas. Texturing can also help with the adhesion of paint and other finishes. Make sure to practice your technique on a small area before applying it to the entire wall to ensure a consistent and professional result.
8. Ensure Proper Drying Time
Allowing adequate drying time between each step of the drywall installation process is crucial for achieving a high-quality finish. Whether you are applying joint compound, primer, or paint, be sure to follow the manufacturer’s recommendations for drying times. Rushing the process can lead to issues such as bubbling, cracking, or poor adhesion. For uneven walls, proper drying is even more critical to ensure that all layers are thoroughly set and that the surface remains smooth. Patience during the drying process pays off in the form of a flawless and durable finish.
9. Sand Smoothly and Evenly
Sanding is an important part of drywall installation, especially on uneven walls. After applying joint compound and allowing it to dry, use a sanding block or pole sander to smooth the surface. Sand in a circular motion and be sure to feather the edges to blend them with the surrounding area. For best results, use a fine-grit sandpaper to avoid creating scratches or gouges. If necessary, apply additional coats of joint compound and sand again to achieve a perfectly smooth surface. Proper sanding is key to eliminating imperfections and ensuring that your drywall looks professional.
10. Inspect and Repair Any Remaining Issues
After completing the drywall installation and finishing process, carefully inspect the walls for any remaining issues. Look for spots that may need additional touch-ups, such as small holes, dents, or uneven areas. Address these issues by applying more joint compound, sanding, and painting as needed. A thorough inspection ensures that no imperfections are left behind and that the final result meets your expectations. Taking the time to repair any remaining issues will help you achieve a polished and seamless finish, even on walls with initial unevenness.
Conclusion
Drywall installation on uneven walls presents unique challenges, but with the right techniques and tools, you can achieve a professional and smooth finish. By assessing and preparing the wall properly, using leveling compounds, furring strips, and drywall adhesive, and carefully finishing with trowels and sanding, you ensure a high-quality result. Don’t forget to use corner beads for sharp edges, apply a primer before painting, and inspect for any final imperfections. Following these tips will help you overcome the challenges of uneven walls and achieve a flawless drywall installation. With patience and attention to detail, your finished walls will look impeccable and stand the test of time.
FAQs
1. What should I do if my walls are extremely uneven before starting drywall installation?
If walls are extremely uneven, consider using furring strips or applying a leveling compound to create a more uniform surface before installing drywall. This ensures a smoother and more stable base for the drywall.
2. Can I use drywall adhesive alone for installation on uneven walls?
While drywall adhesive can help, it is best used in conjunction with mechanical fasteners like screws or nails. Adhesive alone may not provide sufficient support, especially on uneven surfaces.