Drywall repairs are essential for maintaining the appearance and integrity of your walls and ceilings. Whether you’re addressing minor cracks, dents, or major holes, understanding common mistakes can save you time, money, and frustration. Poorly executed drywall repairs can lead to unsightly finishes, recurring problems, and even structural issues. From incorrect application techniques to using the wrong materials, each misstep can affect the final outcome. In this comprehensive guide, we’ll explore the top 10 common mistakes to avoid in drywall repairs. By recognizing these pitfalls, you can ensure a smooth, professional-looking finish and enhance the durability of your drywall repairs.
Common Mistakes to Avoid in Drywall Repair
1. Skipping Surface Preparation
Proper surface preparation is crucial for successful drywall repairs. Skipping this step can lead to poor adhesion and an uneven finish. Before you begin, ensure that the area is clean, dry, and free of dust and debris. For small holes or cracks, use a utility knife to remove any loose or damaged drywall. For larger repairs, it’s essential to sand the edges of the repair area to create a smooth transition between the old and new surfaces. Applying a primer can also enhance adhesion and prevent future issues. Proper surface preparation helps the repair compound adhere better, reducing the chances of cracks or peeling in the future.
2. Using the Wrong Repair Compound
Choosing the right repair compound is vital for achieving a professional finish. Many homeowners make the mistake of using general-purpose joint compound for all types of repairs. While joint compound is suitable for small patches, larger repairs or those on high-traffic areas might require a specific type of compound. For example, setting-type compounds are ideal for larger holes or areas with high moisture levels, as they set quickly and offer a strong bond. On the other hand, lightweight compounds are best for minor repairs due to their ease of application and sanding. Selecting the appropriate compound based on the repair’s size and location ensures durability and a smoother finish.
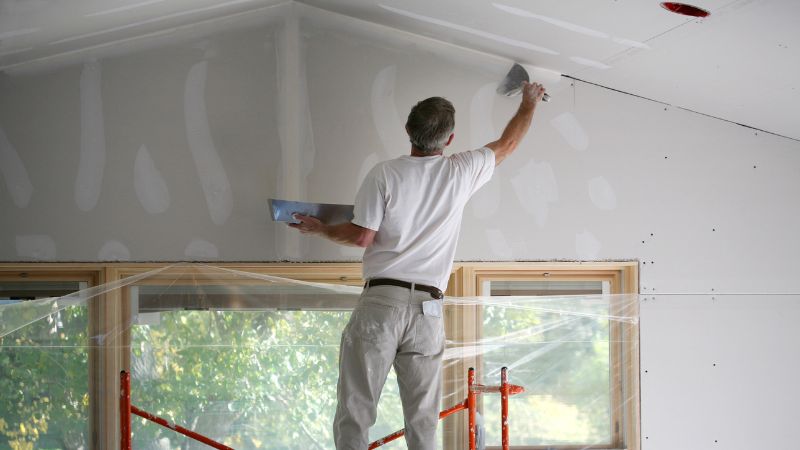
3. Applying Too Much Compound
Applying too much compound is a common mistake that can lead to an uneven surface and excessive sanding. It’s tempting to fill a hole or crack with a thick layer of compound, but this approach often results in a bulging surface. Instead, apply the compound in thin layers, allowing each coat to dry completely before adding another. Use a putty knife to spread the compound evenly and feather the edges to blend with the surrounding drywall. This technique helps to achieve a smooth and level surface without requiring excessive sanding. Thin layers also reduce the risk of cracks and shrinkage as the compound dries.
4. Neglecting Proper Drying Time
Patience is key when it comes to drywall repairs. Neglecting proper drying time is a mistake that can lead to poor results. Each layer of compound needs adequate time to dry before applying the next coat. Rushing the process can cause the compound to crack, peel, or fail to adhere properly. Follow the manufacturer’s instructions for drying times and consider the ambient conditions, such as temperature and humidity, which can affect drying rates. Additionally, using a fan or dehumidifier can help speed up the drying process. Allowing each layer to dry thoroughly ensures a stronger bond and a smoother finish for your drywall repairs.
5. Over-Sanding the Repair Area
Sanding is an essential step in drywall repairs, but over-sanding can cause more harm than good. Excessive sanding can damage the surrounding drywall and create uneven spots. To avoid this, use fine-grit sandpaper and sand gently to blend the edges of the repair with the surrounding surface. Focus on creating a smooth transition rather than sanding aggressively. For larger repairs, consider using a sanding block or pole sander for better control. If you notice low spots or imperfections, apply another thin layer of compound, let it dry, and sand again. Proper sanding techniques help achieve a seamless finish without compromising the integrity of your drywall.
6. Ignoring Texture Matching
Matching the existing texture is crucial for achieving a uniform appearance after drywall repairs. Ignoring this step can result in a noticeable difference between the repaired area and the rest of the wall. If your walls have a textured finish, such as knockdown or popcorn, use a matching texture spray or technique to replicate the pattern. Practice on a scrap piece of drywall to get the texture right before applying it to the repair area. For more complex textures, consider using a texture tool or sponge to mimic the original finish. Ensuring that the texture matches helps blend the repair seamlessly with the rest of the wall, enhancing the overall appearance.
7. Failing to Use Drywall Tape
Drywall tape is essential for reinforcing joints and preventing cracks in drywall repairs. Failing to use tape or using it incorrectly can lead to weak repairs and visible seams. For best results, apply drywall tape to the joint or crack before applying the compound. Embed the tape into the wet compound using a putty knife, ensuring it’s fully covered. For corners or joints, use paper tape for better strength, or mesh tape for a quicker application. Applying a thin layer of compound over the tape and feathering the edges will create a seamless finish. Proper use of drywall tape enhances the strength and durability of your repairs.
8. Incorrectly Installing Drywall Patches
When repairing larger holes, installing drywall patches correctly is crucial for a lasting fix. Incorrect installation can result in gaps, uneven surfaces, and potential structural issues. For small to medium-sized holes, use pre-cut patches or mesh tape. For larger repairs, cut a piece of drywall that fits snugly into the hole and secure it with screws or adhesive. Ensure the patch is level with the surrounding wall and apply joint compound around the edges. For added strength, consider using a backing board or support behind the patch. Proper installation of drywall patches prevents future problems and ensures a stable and smooth repair.
9. Not Addressing Moisture Issues
Moisture can severely affect drywall repairs, leading to mold growth and damage. Neglecting to address moisture issues before starting the repair can result in recurring problems. Before repairing any water-damaged drywall, identify and fix the source of moisture, such as leaky pipes or poor ventilation. Remove any moldy or damaged sections of drywall and allow the area to dry completely before proceeding. Use moisture-resistant drywall or add a primer designed for high-humidity areas to prevent future issues. Addressing moisture problems ensures that your drywall repairs are durable and prevents the recurrence of damage.
10. Rushing the Repair Process
Rushing through drywall repairs can lead to a host of issues, including poor adhesion, uneven surfaces, and visible flaws. Each step in the repair process requires careful attention and adequate time to ensure a professional finish. Take your time with surface preparation, application of compound, and sanding. Allow each layer of compound to dry fully before proceeding to the next step. Rushing can result in a less durable repair and an unsightly finish. By giving each step the time and attention it deserves, you can achieve a smooth, seamless repair that enhances the overall appearance and longevity of your walls.
For More Related Posts Keep Visiting: Drywall Contractor Jacksonville
Conclusion
Avoiding these common mistakes can make a significant difference in the quality of your drywall repairs. From proper surface preparation to matching textures and addressing moisture issues, attention to detail is key to achieving a professional finish. Each mistake, if not addressed, can lead to a less durable repair and a less polished appearance. By following these guidelines and taking your time, you can ensure that your drywall repairs not only look great but also stand the test of time. Remember, a well-executed drywall repair enhances the overall quality of your home and adds to its visual appeal.
FAQs
1. How long should I wait between drywall repair coats?
Allow each coat of compound to dry completely before applying the next one, typically 24 hours. Drying time can vary based on the compound used and environmental conditions.
2. Can I use regular paint on repaired drywall?
Yes, once your drywall repair is complete and properly sanded, you can use regular paint. However, it’s advisable to use a primer first to ensure a smooth and even finish.